How to add watermarks in adobe lightroom
- April 1, 2023
- Trends
Whether you are a blogger, influencer, or techie, you would want to safeguard your creative work from prying eyes. This is one of the main reasons why one should watermark their products. Watermarking not only helps in protecting the copyright of your work, but it also helps build authenticity.
So, what is a watermark?
A watermark is a superimposed text or logo that is placed over a photograph or video letting others know of the product’s original creator.
Let’s see how we can add watermarks to a photograph using Adobe Lightroom Mobile. Follow these step-by-step instructions.
1. Open the Lightroom app. Click on the Setting (or Gear) icon in the top right corner and choose Watermarking.
2. Here, you can either add your watermark as text or as your logo.
3. Type the text you want to save as your watermark.
4. Or upload the png file of your logo to be superimposed on your picture as a watermark.
Let’s check out the text watermark first.
Step 1: Adding a Text Watermark on Lightroom Mobile
1. Open the image on Lightroom Mobile App.
2. Click on the up arrow at the top and choose Export as…
3. Toggle the Include Watermark option to ON.
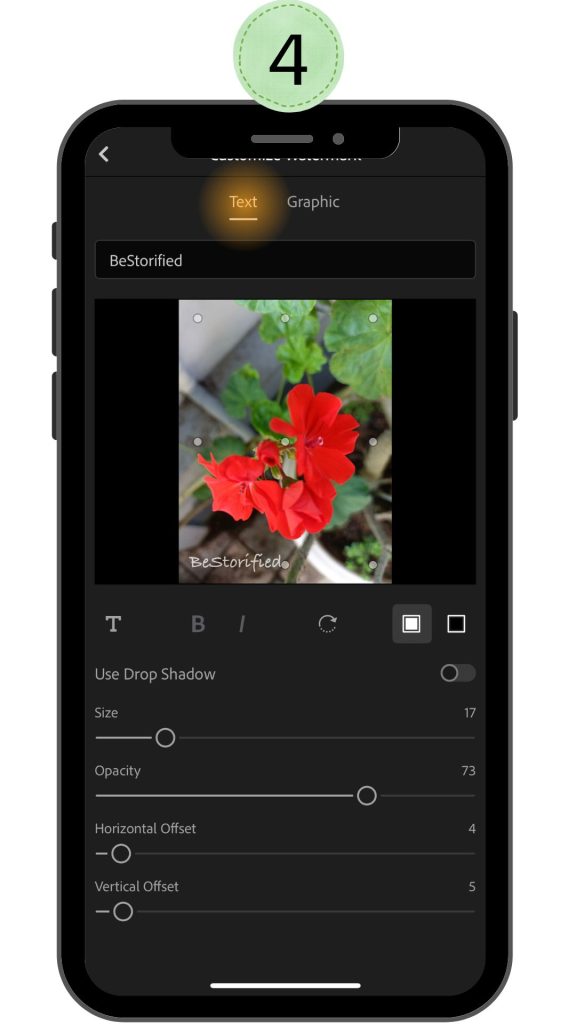
4. Here you can customize between text and image watermarks. Tap ‘Text’ and type in the required text you want as the watermark to your image. Here, we have mentioned ‘BeStorified’.
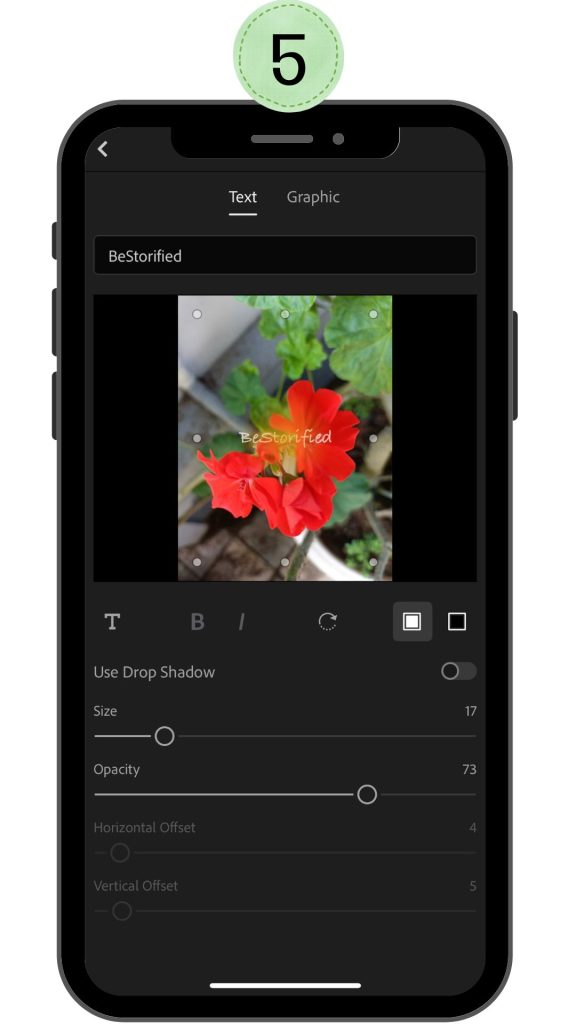
5. You may change the position of the text by tapping on the circles on the image. You can choose the horizontal and vertical offset options to move around the text.
You may also choose ‘T’ to change the font of the text, ‘B’ to bold, and ‘I’ for Italics.
Tap the white and black squares to change the text colour from white to black.
The ‘Size’ slider can change the size of your text and ‘Opacity’ to adjust the transparency.
6. Once you are done customizing, click on the back arrow at the upper left corner to take you back to the Export screen. Export the image to a location of your choice. That’s it!




Step 2: Adding a Graphic Logo as Watermark on Lightroom Mobile
1. Let us now set up a graphic logo as a watermark. The first three steps are the same. Open the image on Lightroom Mobile and click on Export As… Toggle the Watermark option to ON and click on Customize.
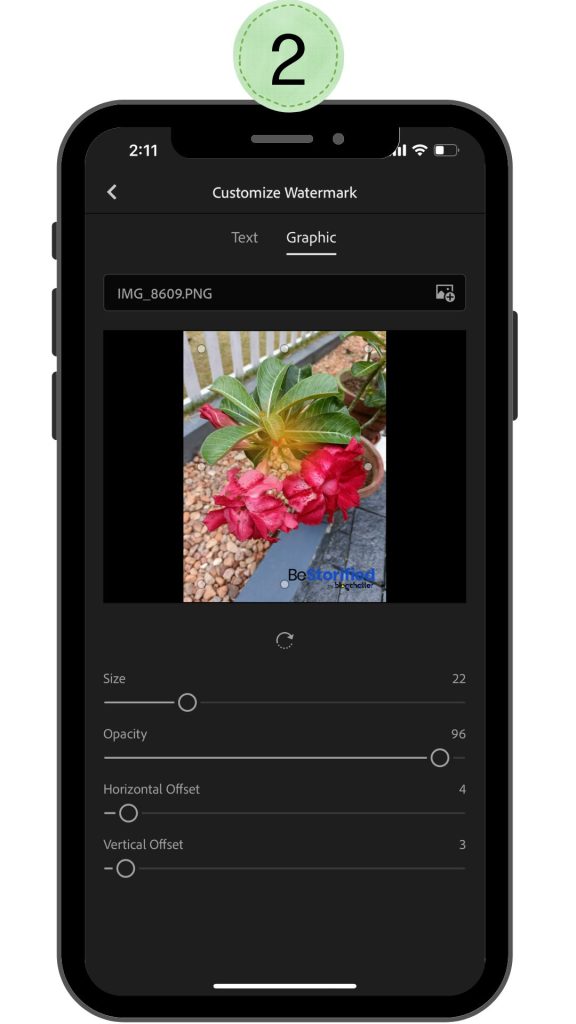
2. Choose Graphic and then import your graphic/logo to Lightroom.
3. Similar to the ‘Text’ watermark, you can change the position of the logo by tapping on different circles on the photograph. You may also alter the size and opacity of your logo.
4. Once you are done customizing, export the photograph to have the image with a graphic watermark. That’s it!



Your watermark is now set up. The next time you want to export a photograph with the same text or graphic watermark, you will only need to tap the export button and choose ‘Export As…’
It is that easy!
Hope you enjoyed learning this cool trick and would now be able to safeguard your images with watermarks.


